Stef has always enjoyed the droids more than the people in the Star Wars movies. With that in mind, and thinking about our budget this time of year, we decided to go for a less commonly seen droid from the movies….the MSE-6 better known as the Mouse Droid.
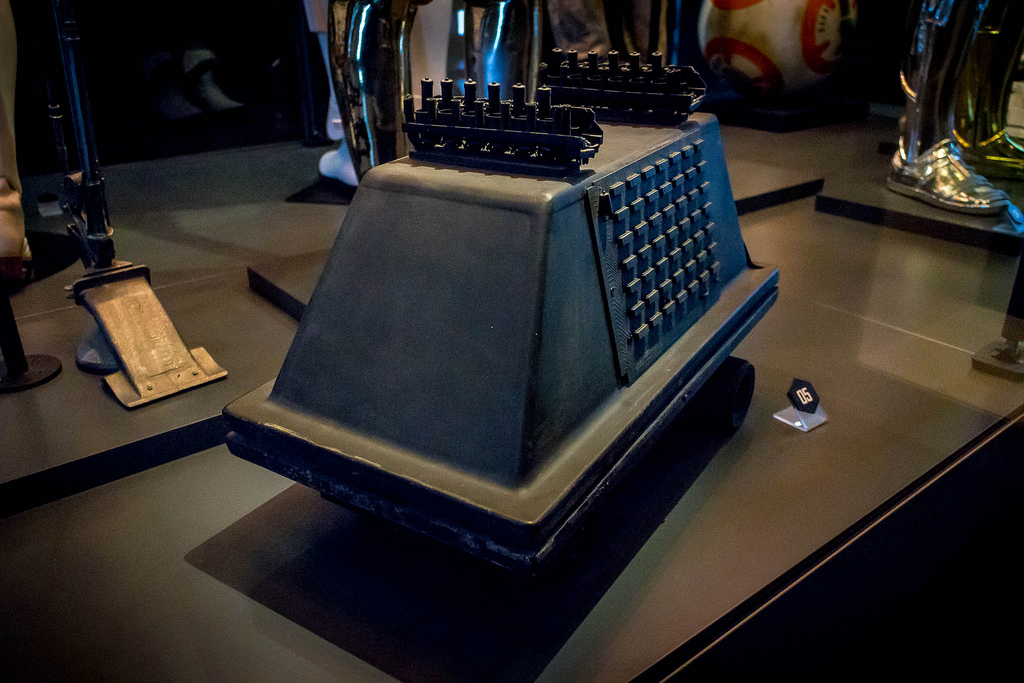
The droid is only about knee high and has nothing fancy about it, in fact it is very plain. It has a few sounds that demonstrate it computing but no lights, no cute expressions, just straight and to the point. However, the builders of these droids will expand on the Star Wars universe and try to find any version possible to demonstrate the Imperial forces most common, and perhaps famous and forgotten droid of the original trilogy. You will find side panels that expand outward to expose a mechanical arm or a video screen. Some have lights along the bottom that can turn any dance into a disco. We are not sure currently how far we want to take our little droid, but for now we will stick to the movie version.
The MSE started with a Trexxas Bandit remote control car. This car has been proven to carry the weight of the frame and shell of the MSE when the struts have had the oil removed and stiffened. To stiffen the struts, and still keep the car’s look, PVC pipe can be put into the strut cylinder.
The frame can be made of plastic or wood. Ours is made of wood. Each space/gap being 1/2″
The shell is a light weight plastic most often vacuum formed, but it is also not uncommon to see wood, resin or metal. For our project, we are using plastic to keep the weight down.
Each shell piece has a wood reinforced lip to keep any impacts from breaking the shell.
The top shell is where the most variety comes in. The one appearance of the Rebels having a MSE, there were not antennas on top. The
Imperial MSE normally always has them. Ours are 3D printed and in 3 pieces total. The three pieces will be combined and attached to the top shell piece similar to the image to the right.
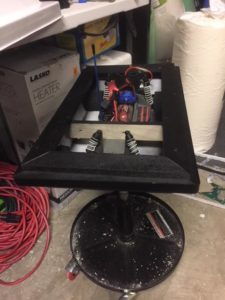
Currently we are working on putting together the circuit boards for the sides. This is pretty time consuming so will have to update as we get the circuit boards put together, painted and attached to the top.
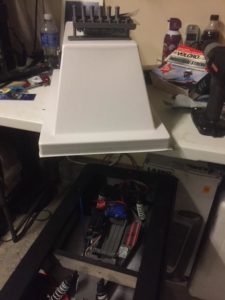
Our build is a 2 section, top and bottom. The frames are attached to the shell with velcro, the top and bottom shell pieces will sit on top of each other with the help of the frame. The frame is built so the top will nestle inside the bottom frame and prevent slippage. The whole unit will be painted satin black.
In addition to just the appearance, the MSE will also have an internal speaker with Bluetooth set up. This will enable a sounds to be played from MP3, phone or an advance controller if we decide to swap it out in the future.
Expect this project to be completed prior to November.